Many have fought it, but nowadays even the purists have come around to vertical video. Whether you’re a big brand, small biz, or simply trying to be #instafamous, one thing is clear: if you want to go viral, you’d better get vertical—and having horizontal stock footage doesn’t have to stop you. By considering horizontal footage to crop, you’ll find a much larger selection of videos to choose from, as well as flexibility when you need video in horizontal and vertical formats for sharing on different platforms. Learn how to crop video in Adobe Premiere and go vertical in four simple steps.
Selecting a Video to Go Vertical
When determining if a horizontal video will work vertically, it’s important to remember that much of the original image is getting removed—a medium or wide shot to start often works best. Also look for vertical subjects, such as a tall building or person. Or go with something with an even background, like fun sparkles or a galaxy. Our Content Marketing and Essentialism collections are great places to start. Keep in mind you may want to download a few related clips and see how they look cropped. Luckily, with unlimited downloads and this simple project setup, it’s super easy. For this tutorial, we’ll use this stock clip of colorful candy to crop video in Adobe Premiere and create the perfect Instagram Story.Step 1: Import Your Clip and Create a Sequence
Open a new Project in Premiere and import your clip. Create a new sequence by right-clicking the clip in the Project Panel and choosing New Sequence from Clip.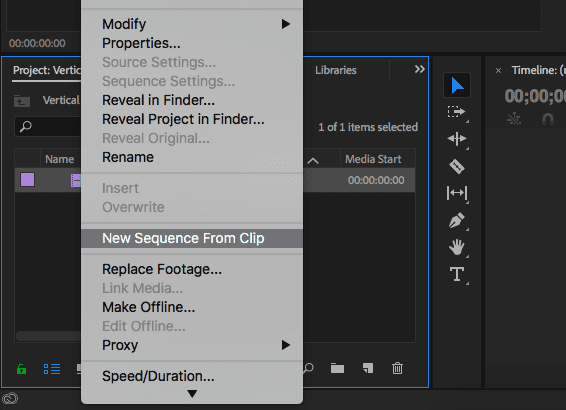
Step 2: Edit Sequence Settings
Now right-click on that new sequence in the Project Panel and choose Sequence Settings. Select Custom for the Editing Mode and set the Frame Size to 1080×1920, or a 9:16 ratio. For the pixel aspect ratio, choose Square Pixels. Pro Tip: Use this technique for other sizes as well, such as square video.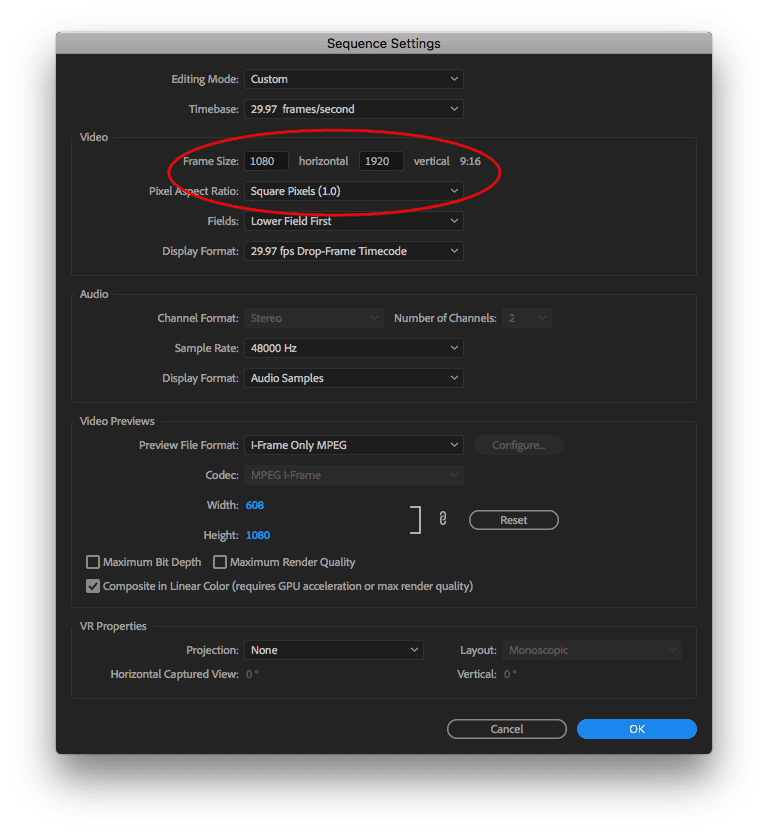
Step 3: Resize and Crop the Video
Cropping your video in Adobe Premiere is easy. Open the Effect Controls (Window > Effect Controls), select your clip, and use the Scale and Position tools under the Motion tab to find a perfect crop. Watch the video all the way through to ensure the framing still works with any subject and camera movement.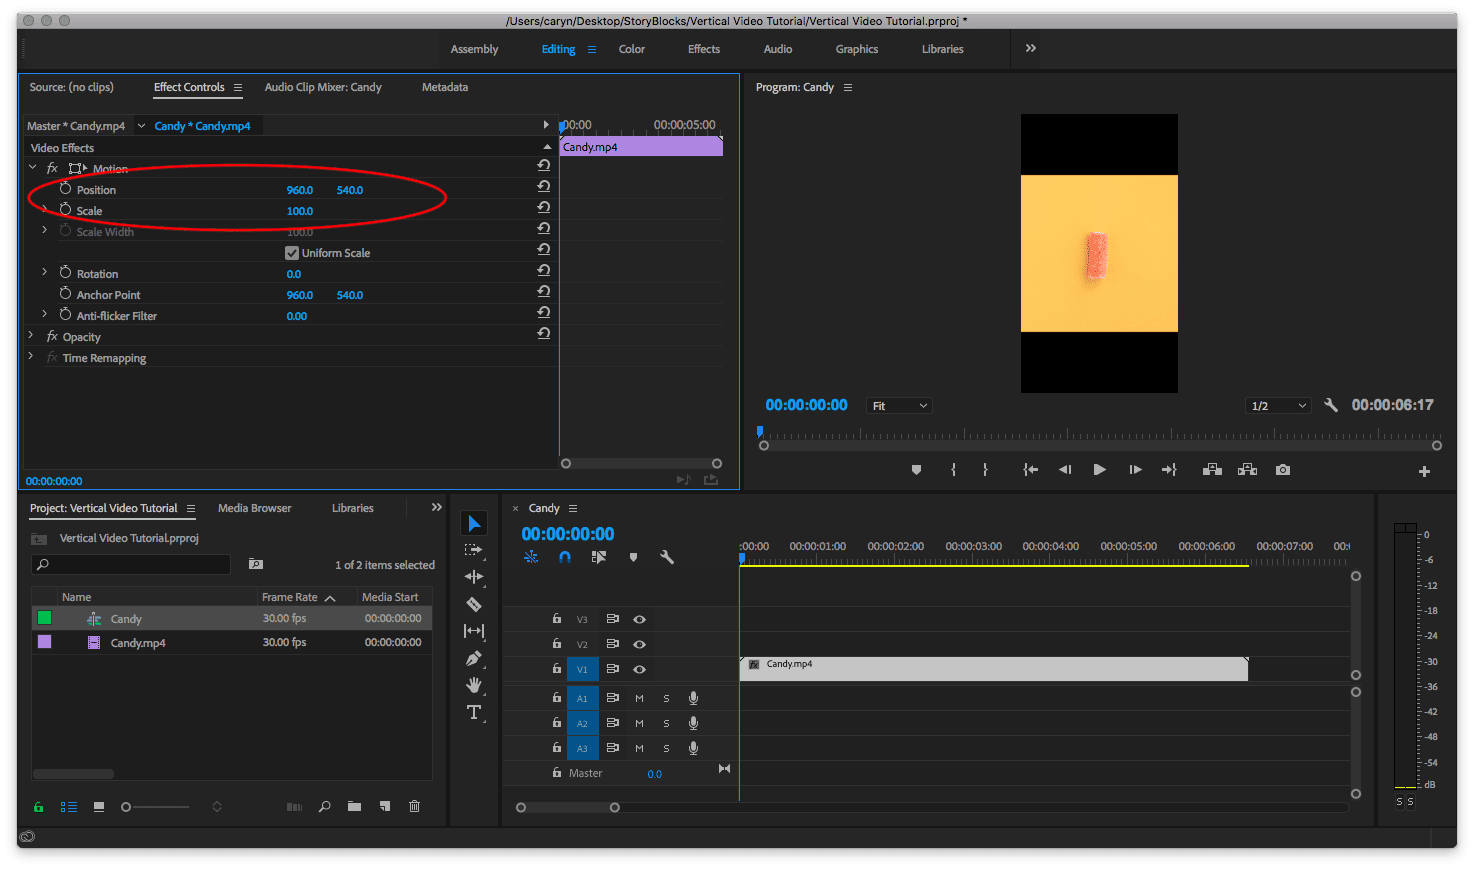 Level up: While in Premiere, you may also want to cut your video to the appropriate length for the channel you’re using, or even get fancy with multiple clips and music.
Step 4: Export Your Video from Premiere
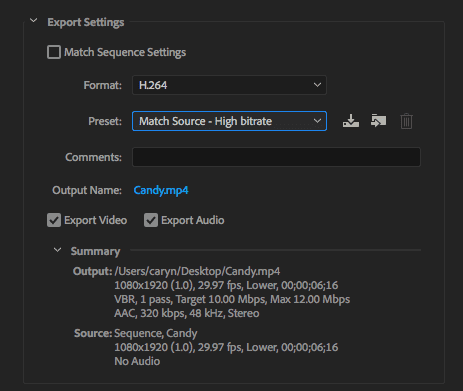
Navigate to File > Export > Media and choose H.264 for the Format, and Match Source – High bitrate for the Preset. Click the Output Name to choose a name and location for your file. At this point, you may choose to save it right to Google Drive or Dropbox for easy access from your phone.