With its versatile capabilities, DaVinci Resolve eliminates the need to move out of the program when keying green screens. You can remove a green screen in DaVinci Resolve in four ways, each offering different difficulty levels. In this article, we’ll take you through how to chroma key in DaVinci Resolve with each of these methods.
4 ways to chroma key in DaVinci Resolve
To chroma key or remove a green screen in DaVinci Resolve, you have four different methods you can use, including:
- The 3D Keyer, which can be found on the Edit page.
- The Delta Keyer and the Chroma Keyer, which are on the Fusion page.
- The Qualifier tool, which is on the Color page.
All four methods will do the same job of keying out a singular color. But each tool has different parameters, which means the results will also be slightly different for each one. Let’s start with the 3D Keyer effect on the Edit page.
Green screening with the 3D Keyer effect
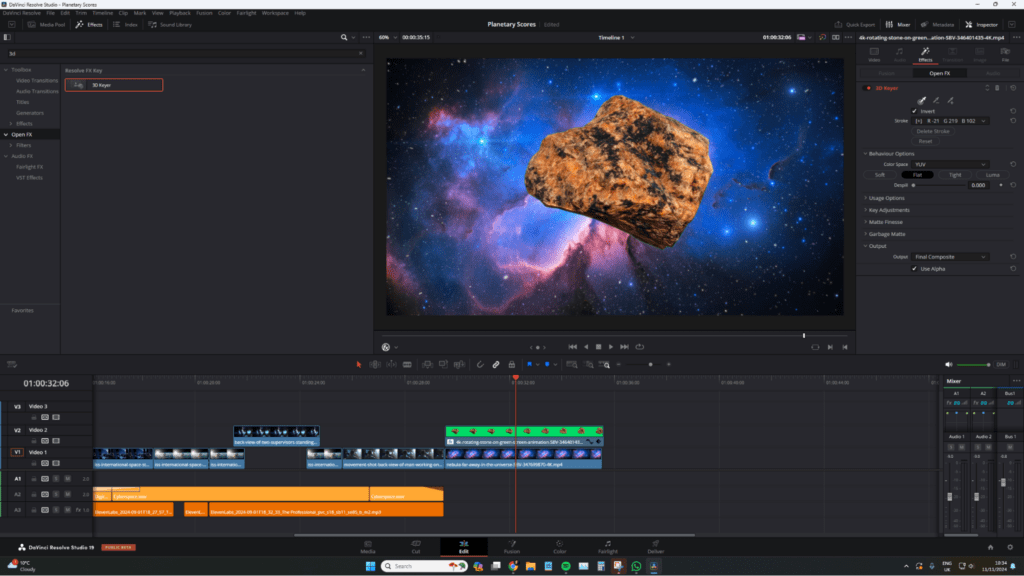
Before we dive into the chroma keying process, your green screen media needs to be on the timeline. It’s important to layer the video clips in a specific order so the composite is presented correctly.
To do this, create a new video track, place the green screen clip on track 2, and then place your background underneath on track 1.
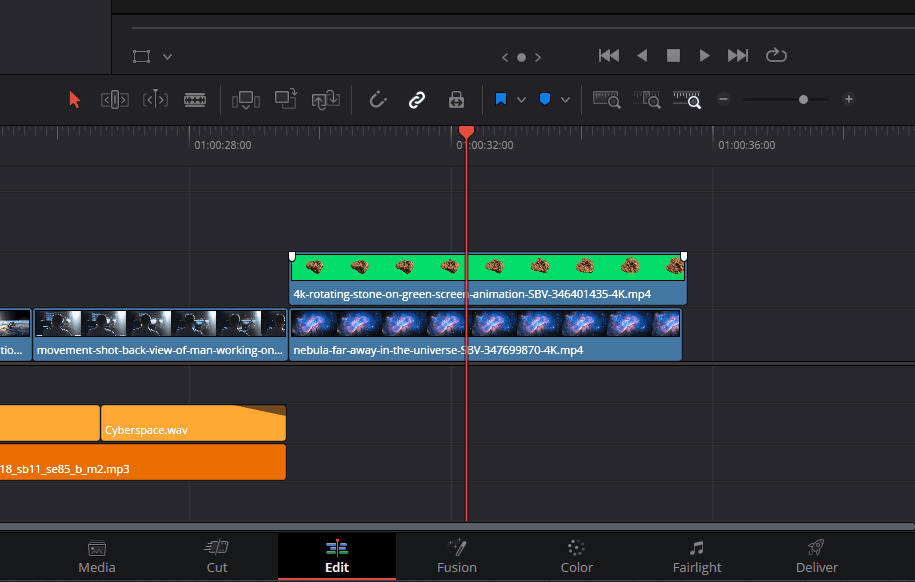
Once your clips are layered in the order like in the screenshot above, we can dive into how to chroma key in DaVinci Resolve using the 3D Keyer effect.
1. Apply the 3D Keyer effect
First, open the Effects Control Panel > OpenFX and search for 3D Keyer. You can find it under the ResolveFX Key grouping. Then, drag the 3D Keyer to your green screen video clip and open the Inspector in the top right corner.
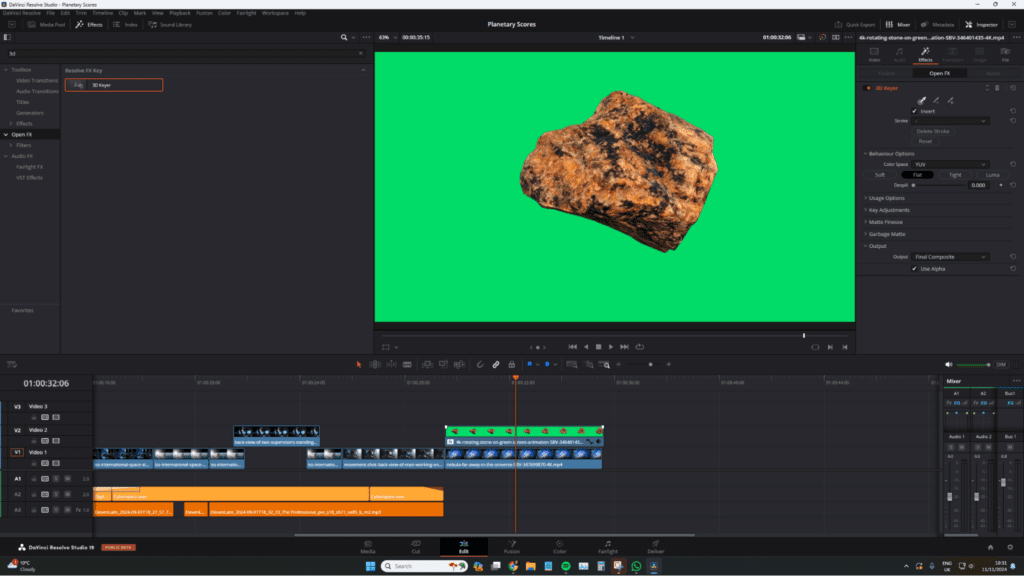
2. Enable OpenFX Overlay
Now that you’ve applied the 3D Keyer effect, you’ll be able to go into the highlighted Effects tab. In the lower left of the Timeline Viewer click the Effect icon and change the setting from Transform to OpenFX Overlay. This lets you interact with the preview monitor.
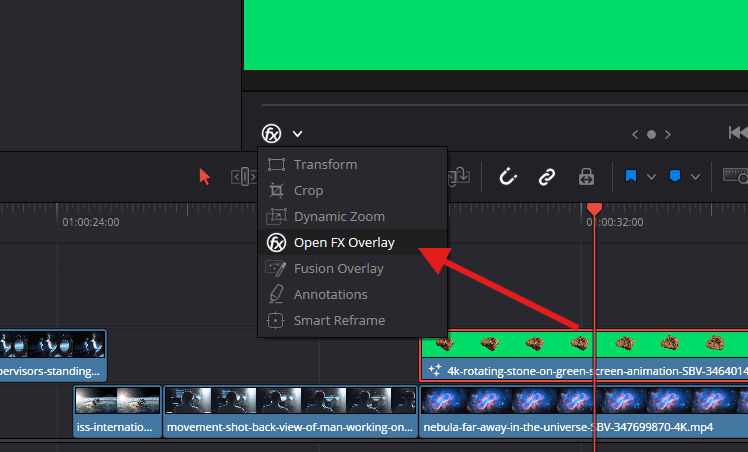
3. Use the Eyedropper Tool to select your green screen color
With the OpenFX overlay active, revert to the Inspector, and within the FX parameter, ensure that the eyedropper tool has the pick function active. Then, set the eyedropper tool over the green within the preview monitor, click, and the background from track one should appear.
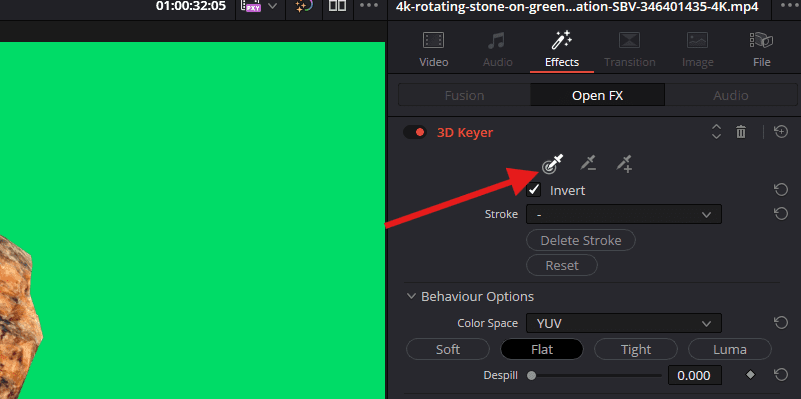
4. Fine-tune the key
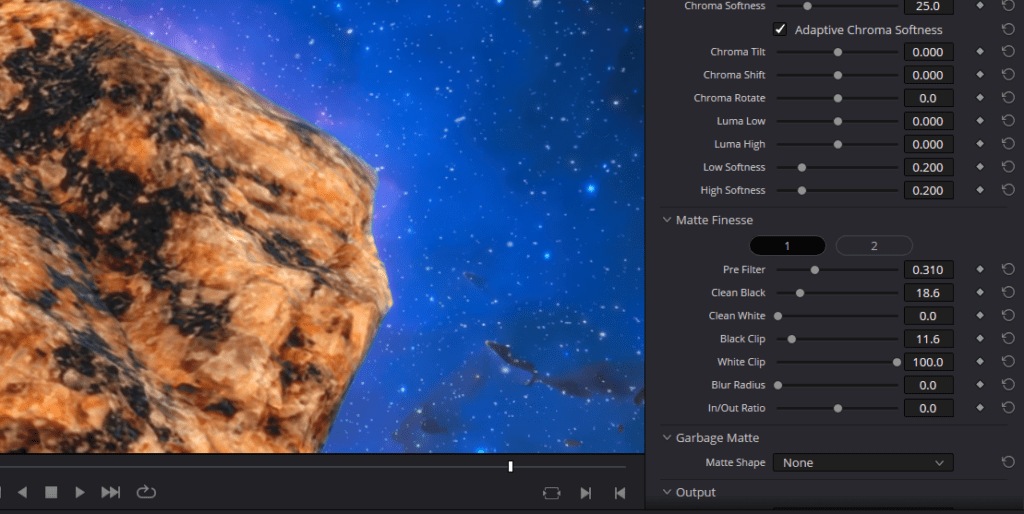
Even if you’ve evenly illuminated your green screen and there’s enough distance between your subject and the green screen backdrop, the key won’t always be seamless in one click. To adjust your key, there are different parameters you can use in the Inspector panel.
Unfortunately, it’s not as simple as telling you exactly what sliders to adjust. There’s no universal setting since everyone’s footage, luminance values, color depth, and data information will vary. The DaVinci Resolve manual by Blackmagic Design offers a few pointers to help you get started:
“The three most common methods of key refinement using the Matte Finesse controls are to increase Clean Black to fill in “holes” in the parts of the image you’re omitting (the background), increase Clean White to close holes in the part of the image you’re isolating (the foreground), and then use Blur Radius and In/Out Ratio controls to blur the edge of the key and push it in and out.”
By adjusting these settings and playing around with the sliders, you should be able to get your key looking how you want it to quickly.
Green screening with the Delta Keyer
The second method for how you can chroma key in DaVinci Resolve is on the Fusion page. It should feel similar if you’ve worked with 3D software using a node-based system vs the After Effects layer-based system.
The Delta Keyer offers advanced functionality compared to the Chroma Keyer, which is covered in the next section. It has additional integration with a clean plate for improved accuracy and extensive options for refining the key, such as pre-matte adjustments, spill settings, and edge handling. As such, this makes the Delta Keyer better suited for challenging keying situations with uneven lighting or complex edges.
Just like with the 3D Keyer method, the first step is to ensure that your video clips are correctly layered before you get started.
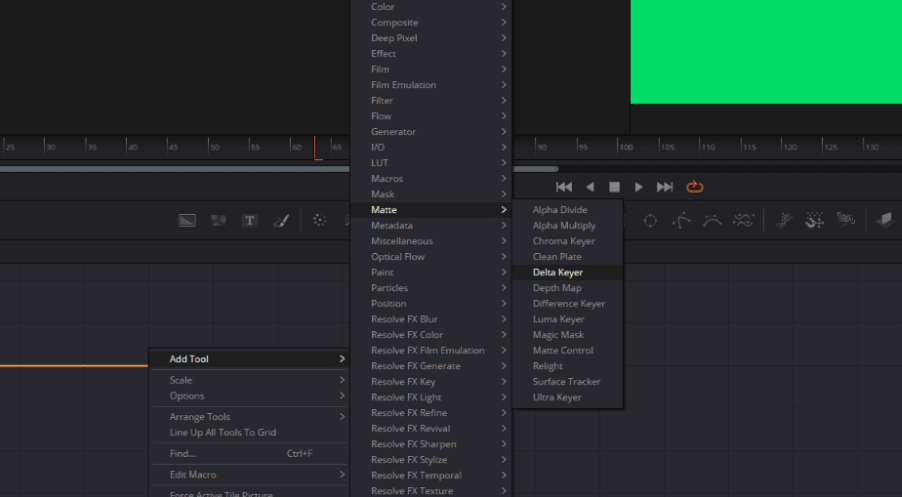
1. Add the Delta Keyer in Fusion
Select the green screen clip, then click over to the Fusion tab. In the node structure, select Add Tool, then go down to Matte and choose Delta Keyer. Delta Keyer should appear between Media In and Media Out.
2. Select your green screen color
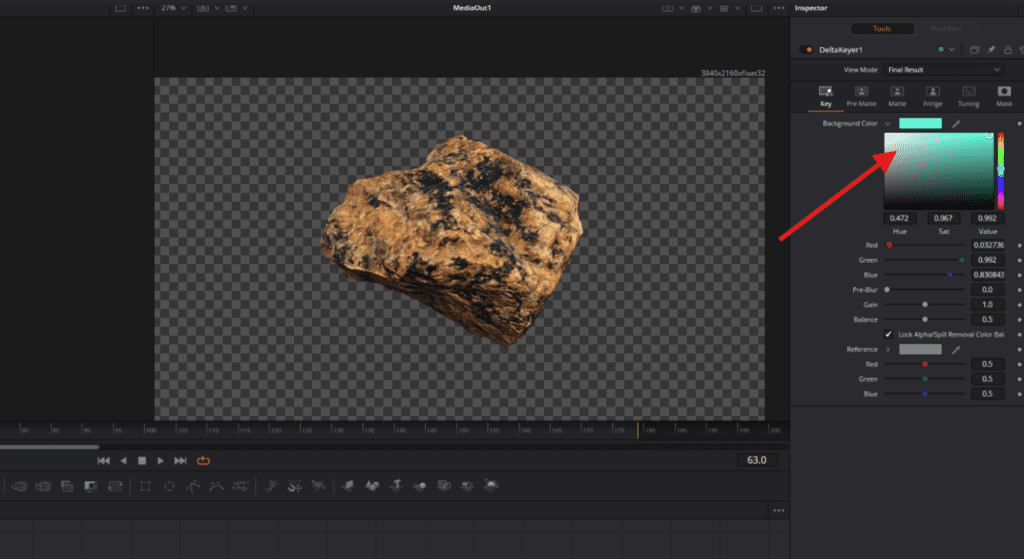
Next, select the Delta Keyer node and the settings for the selected node will appear in the Inspector. Then, choose your eyedropper tool, hover it over the green on the preview monitor, and click to select your color. After that, your green screen should be set.
Using the Chroma Keyer to green screen
The third method is the Chroma Keyer, a tool similar to the Delta Keyer but works differently. The Chroma Keyer is a simple tool for quickly removing a specific color, making it efficient for straightforward keying tasks (with limited control over fine details).
To access the Chroma Keyer, right-click within the node structure, select Tool > Matte, and choose Chroma Keyer. Like the Delta Keyer, you must use the eyedropper tool in the Inspector to select the green screen. Once the key is selected, there is a range of parameters available to refine the key.
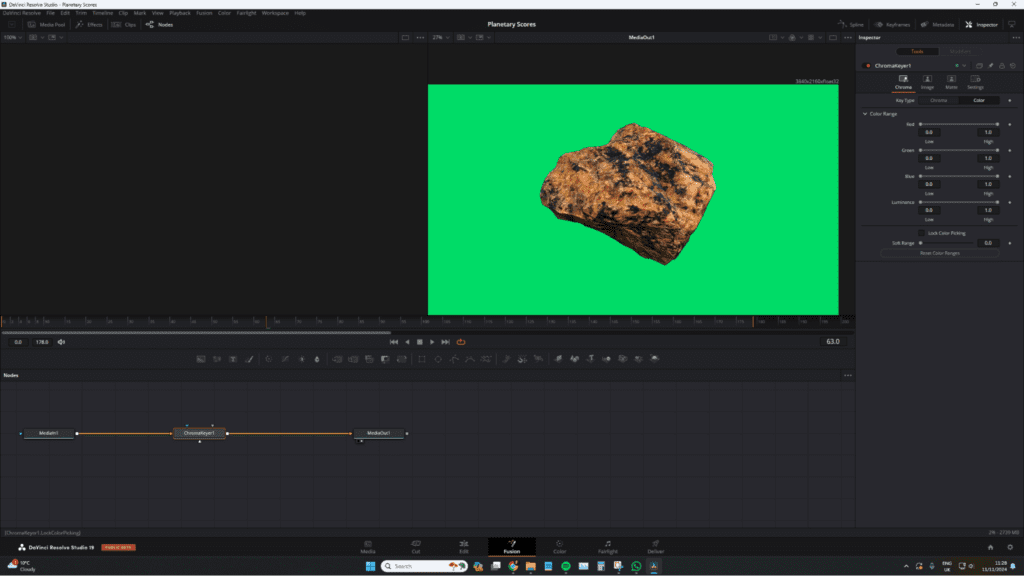
Although we have covered both tools, I recommend using them only if you’re already working within the Fusion page. The 3D Keyer and Qualifier tools available in the Edit and Color pages are generally more efficient when you’re already working inside those pages in DaVinci Resolve.
Green screening using the Qualifier tool
Final method of green screening, the Qualifier tool, is on the Color page. Since the Color page has been specifically built to have control over masks, qualifications, and keys, you’ll always get the best results using this method.
Before you get started with the steps below, be sure that your timeline has been correctly set up so the green screen footage is on top of the background layer. Then, click over to the Color page.
1. Select the background color with the Qualifier Tool
First, make sure that the Qualifier tool is selected in the preview window settings on the lower left, then click the eyedropper tool from the central tool area on the Color page. Next, select the green background.
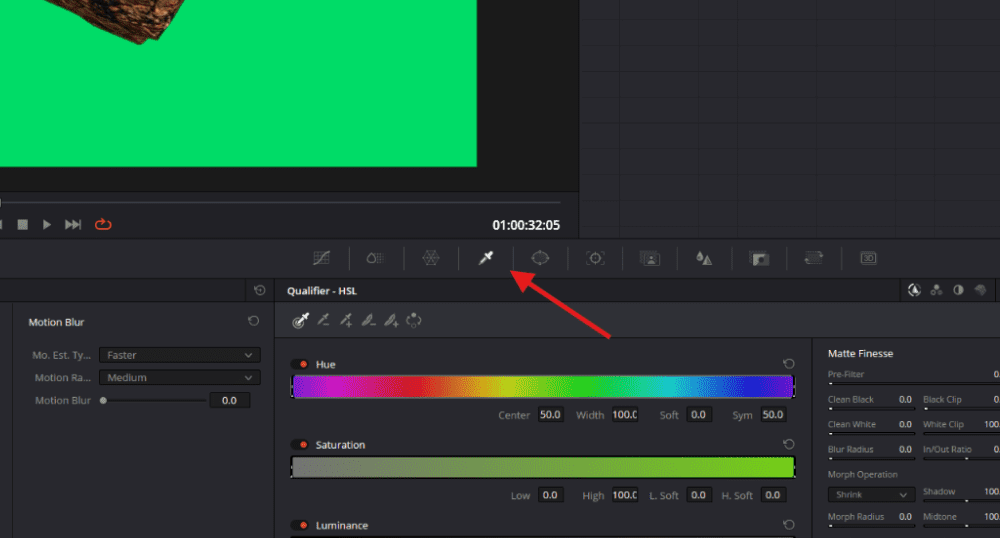
2. Preview and adjust the mask
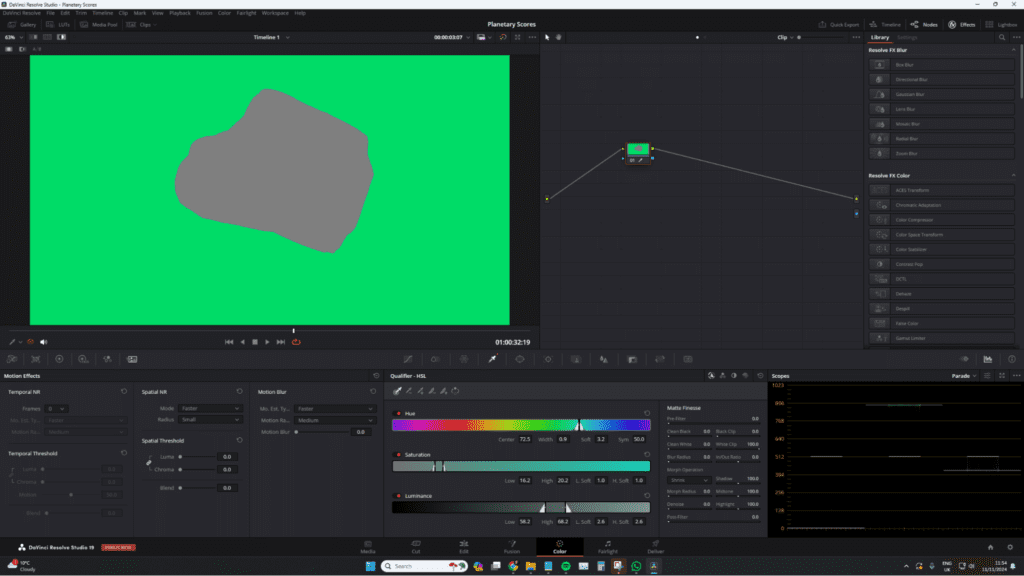
At first, it might not look like anything has changed. But inside the node, you should be able to see that the meteorite in our example has been masked out.
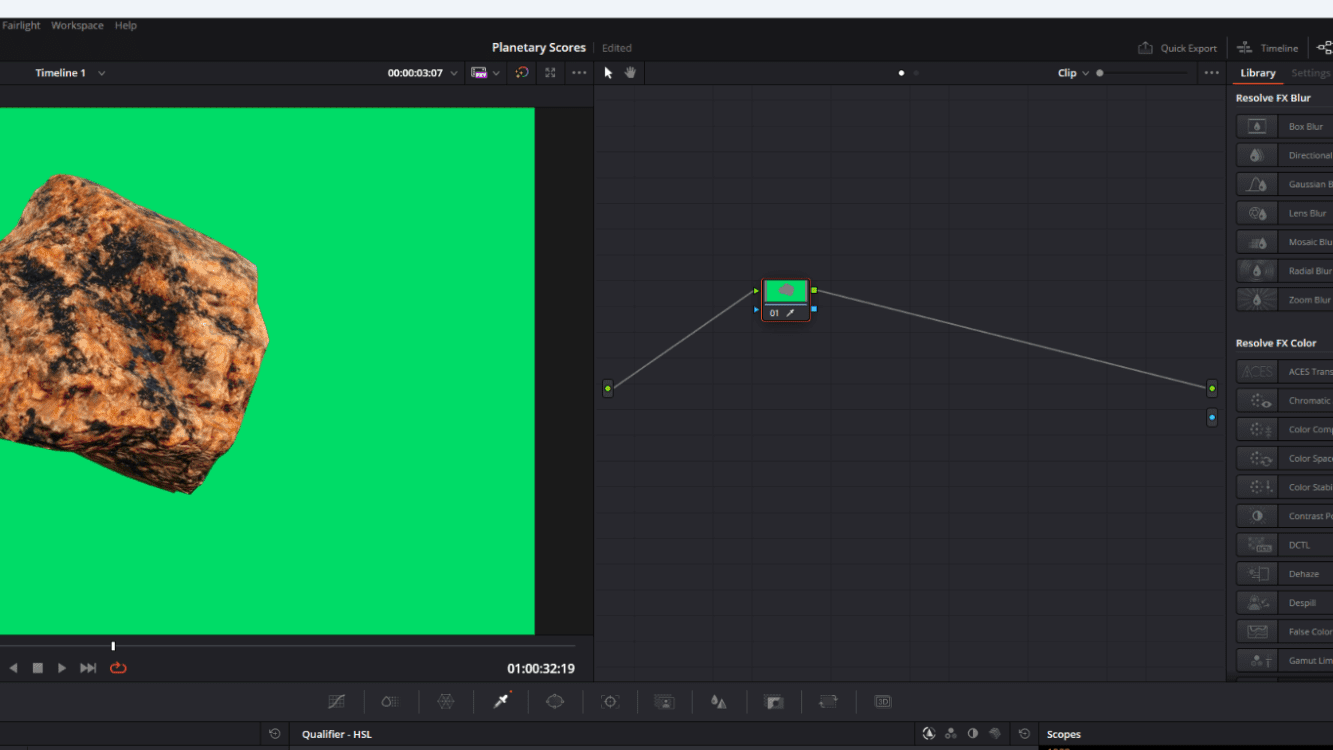
However, we want the background to be keyed, not the object. Next, go to the highlight icon and select it to see what is being masked.
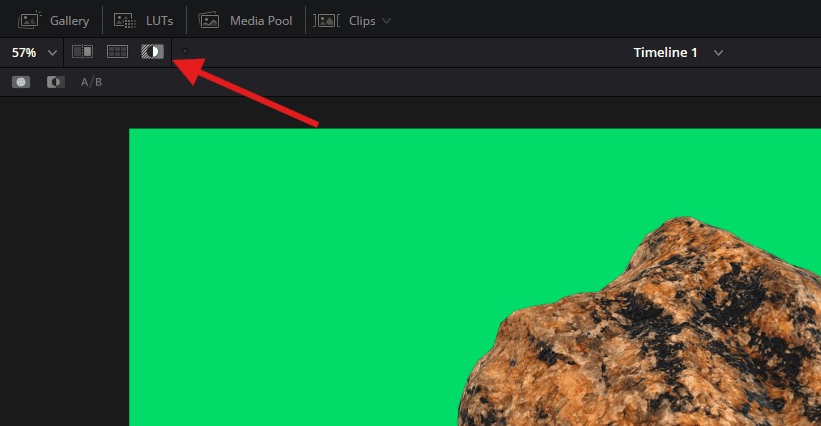
Now, you should see the image affected by the node adjustments.
3. Invert the mask
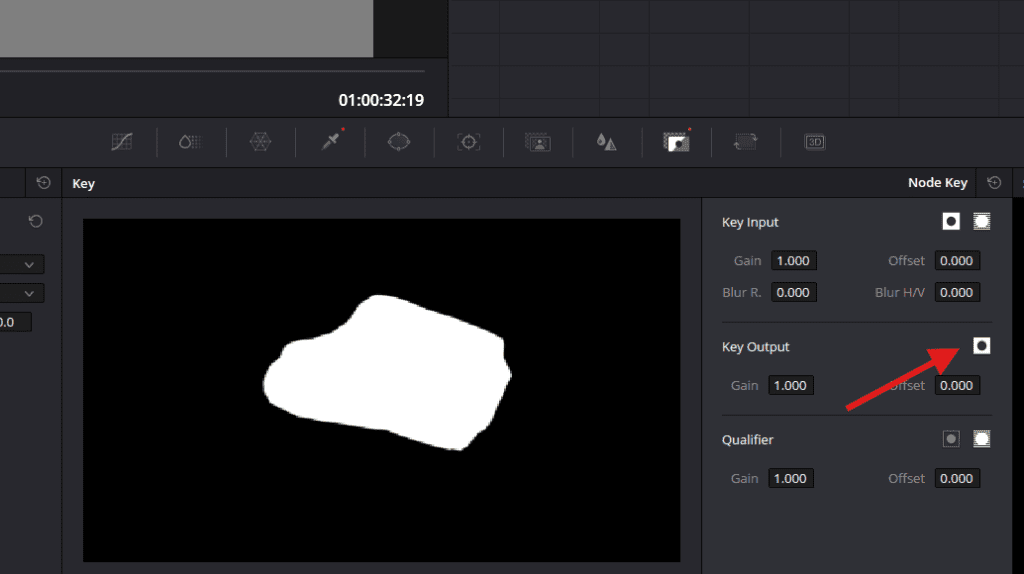
Now, we need to un-invert our mask. Go to the key window within the control parameters and select Invert on the key output. Your mask should now have a gray background, which means that the background has been successfully keyed out.
4. Refine the matte to remove fringing
Even though the background has been keyed out, we may see some fringing (unwanted color edges around subjects) around the meteorite’s edge.
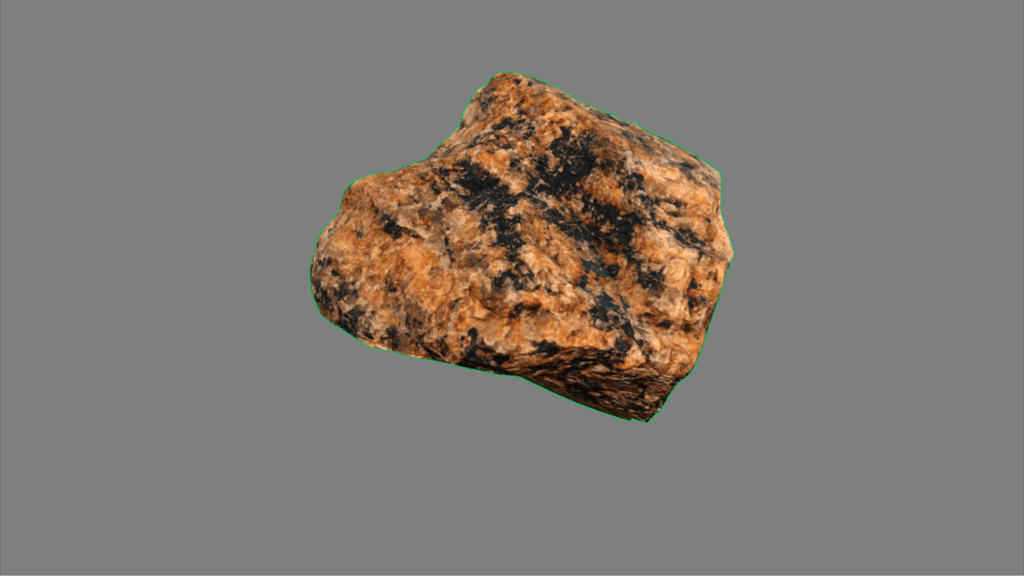
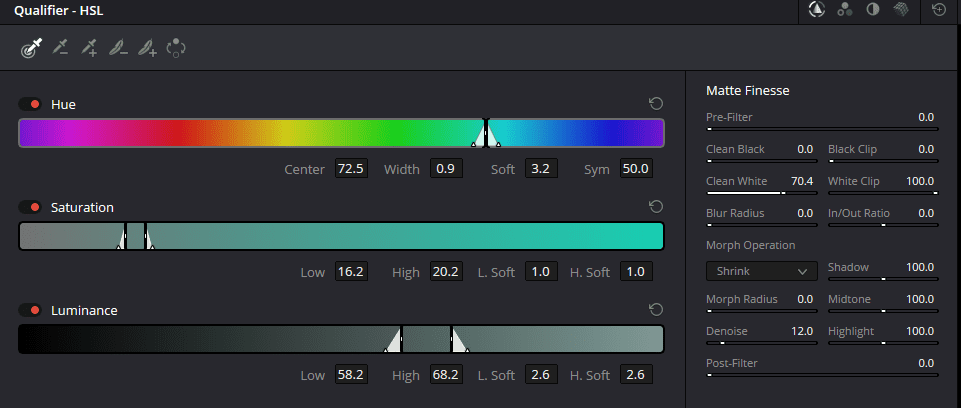
Back in the Qualifier window, you’ll see a Matte Finesse parameter with settings that will help you adjust the matte so no green is left around the object. Like with the 3D Keyer tool on the edit page, there are no set guidelines to give you.
But the three primary sliders you can use to refine the key are Clean Black to fill background holes, Clean White to close foreground holes, and Blur Radius/In-Out Ratio to soften and adjust edges.
5. Add Alpha Output
Now, we need to tell Resolve to render our work as an Alpha Output. You’ll see that if you turn off the highlight icon, you’ll see the green backdrop again. That’s because all the transparent information does not get filtered back into the system.
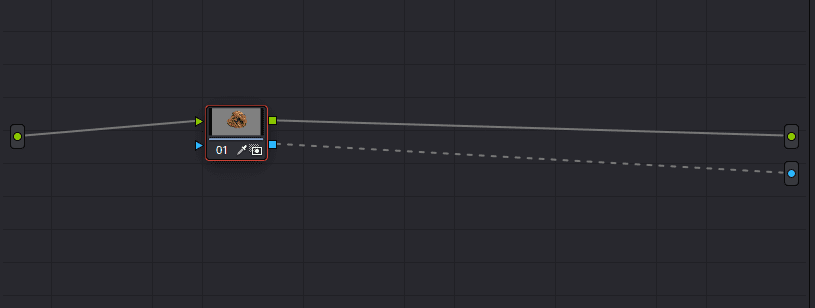
To do this, right-click anywhere within a blank area of the node tree, and select Add Alpha Output. Within your Resolve node structure, click the blue square at the end of the node and drag it to the blue circle.
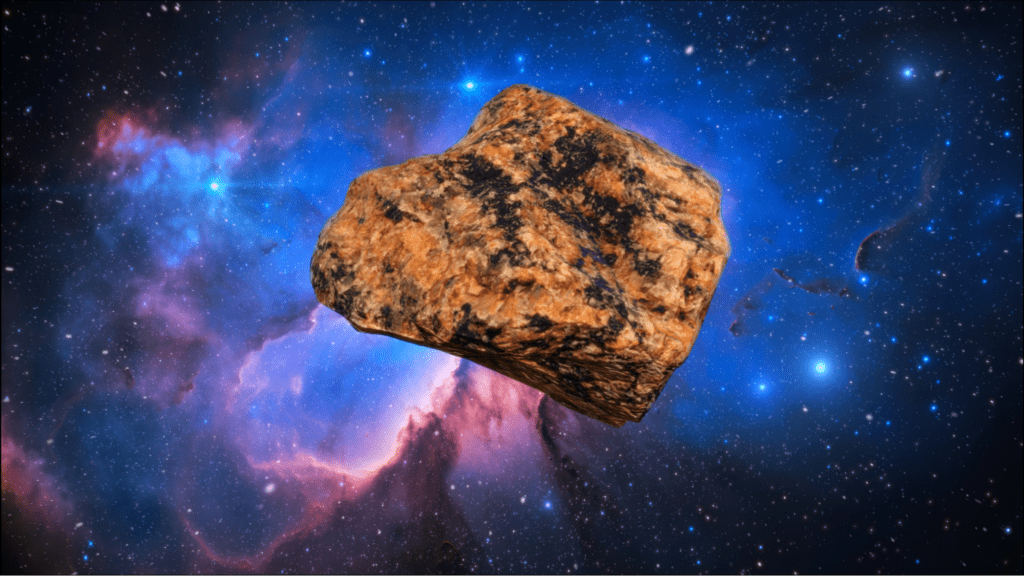
Now, your meteorite is correctly composited onto the backdrop.
Additional ways to use green screen
The concept of chroma keying is one of the oldest visual effects still in use today. Outside of film and television, you likely see it every time you watch the news or a weather report as they also use chroma keying to composite the weather information behind the anchor.
Download this green screen clip.
In film and television, green screens are primarily used to composite actors into entirely new locations or to make a visual effects artist’s job easier if rotoscoping is required. However, green screens serve more purposes beyond that.
Green screens are essential when filming computer or mobile phone screens, since the glare from a screen can prevent filmmakers from accurately showing its content or crew reflections might appear. Additionally, if the information displayed on the device needs VFX, a green screen lets filmmakers and visual effects artists add the correct display content later.
Download this green screen clip of a phone.
Explore more green screen footage on Storyblocks
So, there we have it—the four primary methods of keying a green screen within DaVinci Resolve demystified. Whether you choose to use the 3D Keyer effect, the two keyer options in Fusion, or the Qualifier tool, you should be able to quickly and easily remove green screen backgrounds and open up a world of possibilities for your videos. Learn how to do even more in DaVinci Resolve with our other tutorials, including how to get started with color grading, our beginner’s guide to keyboard shortcuts, and how to fix lagging in 7 steps.
If you want to start compositing within DaVinci Resolve but don’t have a green screen or access to film with one, Storyblocks’ library has thousands of green screen videos to help you practice. With a Storyblocks subscription, you’ll get unlimited downloads of green screen footage, royalty free music, pre-made templates for DaVinci Resolve, and more. Explore our plan options and sign up today to get started.


